Certifications

Article - The 4 Disciplines of Execution

See how Marriott used The 4 Disciplines of Execution to focus on and execute their most wildly important goals while increasing their engagement. To learn more, visit: http://www.franklincovey.com/execution/ Connect with Franklin Covey on Twitter: https://twitter.com/franklincovey Connect with Franklin Covey on LinkedIn: https://www.linkedin.com/company/franklincovey Franklin Covey is a global company specializing in performance improvement. They help organizations achieve results that require a change in human behavior.

ASD 206: Driver Fatigue
Driver fatigue is a reality for many truckers, who frequently work outside the typical nine-to-five schedule. The AAA Foundation for Traffic Safety reports an estimated 16.5 percent of all fatal motor vehicle crashes in the U.S. involve a fatigued driver. Reduced alertness levels not only put commercial drivers lives at risk, but also jeopardize the safety of others on the road. As a leading advocate for safe transportation through rested and alert commercial operators, the American Academy of Sleep Medicine is now offering a free online presentation for truckers describing the signs, causes and effects of driver fatigue and some strategies to manage it. This includes planning well-timed sleep breaks, managing off-hour responsibilities and improving sleep environments.
ASD 210: Driver BOL (Bill of Lading) Policy
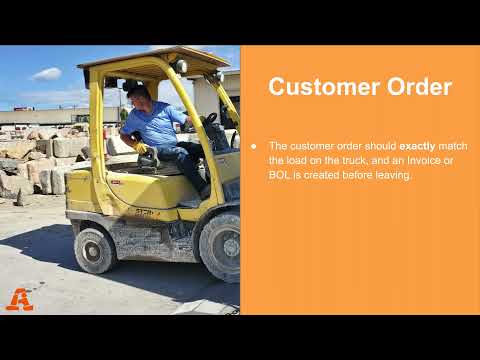
Your paperwork for a delivery includes: 1. A Delivery Request Form 2. A Signed Invoice / BOL. Sales orders and quotations are NOT invoices. We don't want to delivery goods that haven't been paid for. A bill of lading, or BOL, is akin to a receipt for a driver. It tells them what goods are being shipped and to where. The sender, receiver, and driver all sign the bill of lading. All materials leaving either a sales yard or quarry are to be invoiced or put on a bill of lading before they leave. There are no exceptions to this rule. A bill of lading is to be used for all shipments crossing state lines and shipments coming from remote locations without invoicing capabilities. Invoices are to be used for all other shipments. The customer order should exactly match the load on the truck, and an Invoice or BOL is created before leaving. Please see external links for an example of a filled-out BOL. The person originally filling out the BOL for the delivery person should write their name in the bottom left square and sign it. When you deliver the product, your customer must sign paperwork, if they are present. If they are not available, you will sign, date and write the time of delivery, as well as take a picture of the unloaded material. The delivery person is given the pink and the yellow copies, and we keep the white and gold copies. Once a bill of lading has been filled out, scan the white copy and put it in the Odoo bill of lading system, then give it to the responsible salesperson so they can invoice it. The gold copy gets filed upstairs. HOWEVER, if the BOL is being used to transfer goods from one American or Star Stone location to another, the white copy is scanned and attached and the receiving store receives the products from the pink/yellow. The BOL or an invoice transfers ownership from us to the customer. You cannot delivery product anywhere without one of these two documents -- not a receipt, or a sales order. You cannot invoice a customer before they take possession of the material. If you do not have a BOL or an invoice, you are authorized to say "NO" to a delivery. Related information can be found in the Cashier BOL module (see External Links).
ASD 307: Greasing Trucks
New Shop Info: https://goo.gl/maps/HzwG98iioszjQWRP6 TAT Express Inc. 972-225-3017 4140 Langdon Rd. Dallas TX 75241 How to grease a semi/ How to properly grease a semi-truck/ How often to grease a semi-truck/ truck maintenance,grease gun,semi truck,drive shaft,oil change,how to,slack adjuster,truck driver,semi truck maintenance,truck maintenance checklist,truck maintenance tips,truck maintenance hindi,How to grease a semi,How to properly grease a semi-truck,How often to grease a semi-truck,truck maintenance intervals,diesel truck maintenance,grease gun refill,how to grease a semi 5th wheel,how to properly grease a semi truck,how to grease a 18 wheeler Now Hiring! Here at TAT Express, we are always looking to work with highly motivated people and service specialists to join our dedicated and knowledgeable team. CURRENT POSITIONS Service Advisor/ Service Manager https://tatexpressinc.com/service-advisor/ Journeyman Technician https://tatexpressinc.com/journeyman-technician/ Apprentice Technician https://tatexpressinc.com/apprentice-technician/ DPF maintenance is a very important part of keeping semi-trucks running and operating as they should. In this video, I go over what is DPF maintenance and why it's important. If this video has helped you in any way show your appreciation by buying me a coffee ☕️ Cash App:$tatexpress If you have any questions feel free to reach out to us at info@tatexpressinc.com New Shop Info: https://goo.gl/maps/HzwG98iioszjQWRP6 TAT Express Inc. 972-225-3017 4140 Langdon Rd. Dallas TX 75241 Join our Facebook group https://www.facebook.com/groups/2517634715134383/ Check us out on Facebook https://www.facebook.com/tatexpressinc -~-~~-~~~-~~-~- Please watch: "Do Not Delete your Semi/ Do NOT delete your Semi/ Three Reasons Not to Delete your Semi/ DPF Deletes" https://youtu.be/vaP34LuHkZM -~-~~-~~~-~~-~- -~-~~-~~~-~~-~- Please watch: "How to Replace A Wheel Seal on Semi/ Wheel Seal Leak/ Wheel Seal Installation/100kMiles Inspections" https://youtu.be/Ii2FA0yImcw -~-~~-~~~-~~-~- #semitrucks #semimaintenace#TATExpress #dieselengines
CAS 101: Cashier Daily Task List

SL & SN: 

General Cashier Responsibilities 

  • Be friendly with the customers–try to get reviews on Google 
  • Restock and organize shelves with any tools, weed barrier pins, SB products, etc. 
  • Give incoming mail to the designated people 
  • Dust/wipe down work space (front desk) and store area 
  • The Scale book is the main priority (description of vehicle, weight, AND product) 

Opening Cashier Responsibilities 

  • Open the store and a new POS session in Odoo 
  • Make sure the cash is equaled out to $200 and record it on the Daily Cash Report 
  • Put the new date on the scale book every day (if not done the night before) 
  • Clean up any messes and organize the workspace and store area 
  • Check the Delivery Schedule- if there is a delivery make sure that things are ready and it is good to go out. 
  • Take out trash if need be.

Closing Cashier Responsibilities 

  • Scan and attach any Sales Orders along with Delivery Request Forms that haven’t already been done 
  • Restock the fridge and any products on the shelves 
  • Clean up any messes and organize the workspace and store area 
  • Count the cash and record it on the Daily Cash Report, print out a copy of that along with two Bank Deposit Slips to put into GM drawer (2nd copy of Bank Deposit Slip goes in the deposit bag w/ the cash that’s being deposited) 
  • Make sure all the money gets back IN the safe and lock it 
  • Close the POS session in Odoo 

VC: 

Cashier Daily/Weekly Responsibilities 

  • Open the store and POS, making sure the cash is equaled out to $200 
  • Put the new date on the scale book each day 
  • Clean up any messes, organize and clean/wipe down the workspace for the day. 
  • Utilizing the scalebook for all incoming and outgoing products 
  • Check your personal and vccashier emails for the day 
  • Check your personal, vccashier and lucid calendars for the day and the week 
  • Check the Delivery Schedule- if there is a delivery make sure that things are ready and it is good to go out. 
  • Add new dated sheet to delivery boards. 
  • Organize daily delivery sheets with deliveries into the basket. 
  • Other daily filing as needed. 
  • Check your incoming PO’s board for orders incoming and follow ups. 
  • Check “To Pull” board for daily updates and to do’s. 
  • Check the physical mail daily in the afternoon 
  • Scan in Daily Deposit papers and add to statements in Odoo 
  • Scanning and attaching of receiving documents to PO’s 
  • Complete any other scanning or copying as needed. 
  • Stock shelves with backstock, weed barrier pins, SB products, Aquascapes etc. 
  • Price checks and updates 
  • Make new price signs as needed indoors and outdoors 
  • Daily Customer call list 
  • Daily Reseller checks 
  • Check white board list in conference room for other tasks to complete 
  • Close up store and POS, lock everything. 
  • Daily bank deposits 
  • Refer to the daily/weekly cleaning schedule and complete 
  • Keep track of items that need to be re-ordered. 
  • Office and cleaning supply checks and tracking. 
  • Organizing the Cashier computer’s desktop, sort and organize into labeled and dated folders.
CAS 102: Slow Months

During the winter months, we will continue to experience a downshift in customer count. Along with your daily responsibilities that do not change no matter what the customer flow is, you are finally going to have a bit of time to get organized, educated, and better prepared for high season next year. 


First and foremost, check in with your manager: what are their priorities? Make sure you partner with your managers to ensure that the things they’ve been tasked to manage that you can help with are at the top of your list. 


Run through the contractor customer list and check on reseller permits. Are they expiring within the next few months, the business has been notified by the state to renew, and typically they will have their new one well before the old one expires. Request an updated permit, thank them for their business and invite back, then log a call! 


Deep clean your workspace. This includes old or disorganized files and file cabinets, under desks, in cabinets- get all the nooks and crannies of things that have piled up over the year, things that have been taped down can be scraped up and replaced, windows, surfaces, etc can be washed and areas labeled, organized and tossed if irrelevant. 


Make sure you partner with management before eliminating old filing, these are stored elsewhere for a specific amount of time, but purging does need to happen. 


American Stone has loads to learn about, from products to sales to installation. Make the best use of your time to learn as much as you can so you can speak confidently about all our products and services. We also have policies and procedures that are stone business specific, company rules and regulations, Odoo how-to’s and so much more. 


Pricing audits are so important. Is your showroom price signed? With our prices changing all the time, frequent price audits are important, they are a small promise we make to our customers, and if they aren’t right, it feels misleading. 


Decorate for the holidays- well, of course. Tis the season. Nothing says festive, inviting and family like Holiday Decor. Partner with your manager to get this planned, it’s coming sooner than you think- Also, Marketing has another contest planned for holiday decor. 


Run your top 100 and bottom 100 customer lists. Call the tops and thank them for their business. Call the bottom 100, and let them know we miss them. Partner with your salespeople to schedule site visits on their behalf and put in any opportunities in the system. 


Odoo Clean Up There's never a better time than winter to ensure all the SO’s are in done status, the customer invoices are paid up on time, and the customers with credit have up-to-date documents on file. 


Organize your computer! Review all the scans and downloads, the forms on your desktop and in your personal drive. Make labeled folders for easy accessibility, and ditch what you don’t use, is outdated, or irrelevant. You can do this in your email as well! Make folders for customer information, vendor information, American Stone information and whatever else you may need. Trash all the old, unnecessary, spam and clutter. 


Update any forms, lists and logs you use. If you see standard forms that need updates, contact Human Resources about doing an update. Our business is changing and growing every year. Updating our forms to keep them relevant and attractive lends professionalism to our brand. 


At the end of the year, we prepare Christmas Cards for mailing out and decorate the store.

CAS 103: Definitions & Terminology

Abbreviations & Dept Code: 

LTA = Lon Thomas & Associates Inc 

SSQ = Star Stone Quarries, Inc 

AMS= American Stone Sales, Inc 

LTF = Lon & Bev Thomas Family LLP 

SSS = Star Stone Sales, LLC 

SMP = Stone Mountain Properties, LLC 

TPG = The Platinum Group, LLC DBA American Stone Leasing 

SMM = Stone Mountain Management, LLC 

SL= Salt Lake City 7000 

SN = Sunset 2000 

MY= Moulton Yard 

HB = Heber 

OSS = Oakley Saw Shop 

VC = Vancouver 4000

Sales Definitions: Season '24 (year): Season ‘24 is from April 1, 2024 to March 31. 2025 as an example. 

Commissionable Sale: A transferred sale with an invoice paid, and applied/reconciled before 30 days late. 

Expired Sale: A transferred sale with no payment applied more than 30 days late. 

Pipeline Bonus: Paid out quarterly upon meeting the corresponding 

Bonus Tier quotas. Explained in further detail below. 

Pipeline bonus quotas are subject to being readjusted quarterly. 

Action Selling Certification Bonus: an additional $200, given every 3 years. 

Gross Margin: Sales dollars before tax minus (-) cost of goods sold (COGS). 

Salesperson: Title given to an employee who works hourly on our Inbound Sales Plan Sales Professional: 

Title given to Action Selling Certified in the last 3 years, salaried (exempt), sales employees on the Outbound Sales Plan. 

Out-going Call: A logged call in Odoo with "Done" status in the Outbound category. 

Outside Job-site Visit: A visit that’s logged in Odoo in "Done" status. 

Quote: Any quote you have created and entered into Odoo, and delivered to the decision-maker.

Gross Sales: All Pre-tax Star Stone and American Stone Sales credited to you.  

Definitions and Terminology: 

Odoo: POS vs Personal: Gmail & Google Drive: Primary work related email and storage for Company documents 

Types and stages of orders: POS: Quote: SO: Invoice: Drop shipping: Scalebook: In the Google Drive, 

Store Cash count sheet: Sheet that we fill out at open and close to make sure the till is even after taking out cash deposits. 

Supplier invoice: A document sent by a vendor/supplier to a buyer requesting payment for goods or services. 

Clearing Statement: Matching payments made in Odoo to TSYS payments or cash and validating when difference is zero. (code 681 for cash over or short) 

Bank Statement: A summary of account activity over a certain period of time. Ex: Vancouver Cash, Genius TSYS VC etc. 

CC Statement: A summary of credit activity or how it’s been used, including transactions, applicable fees, and interest charges. Your manager's company CC. 

Loan rec: A supplier invoice between companies also an Accounting function. 

Purchase Order: A way to fill stock items from our vendors to our stores. 

Receiving: Documenting that our Purchase Order has been fulfilled and the amount of product we received. Shipping documents: 

BOL: Bill of Lading Opportunity vs Lead: Manufacturing order: Internal move:

CAS 104: Google Drive Basics
How to: Create, organize, and manage folders, files, and permissions. 00:00 - What we’ll cover 01:00 - How to access Google Drive 01:50 - Google Drive layout 03:28 - How to create files and folders 05:29 - Google Drive templates 06:41 - How to organize Google Drive files and folders 09:05 - How to share Google Drive files 10:50 - How to search in Google Drive
CAS 201:	Employee Questions/Issues
CAS 201: Employee Questions/Issues
How to: Handle employee concerns and make a claim and follow up
CAS 202: Customer Claim
How to: Handle customer concerns to create a claim and follow-up Customer claims are any issues/questions that customers may have. This can include things such as problems with products, payments, and any problems regarding a customer. Most of the time these claims will need to be looked at by accounts receivable and/or general managers. However, we still need to take a look at these once a day to make sure they are being handled.
CAS 204: Opening POS, the Store, & Cashier Responsibilities

1. Verify that everything was done from the prior closing shift. If it's not been done, you are responsible for completing these tasks. 

2. Open the front door; unlock the back door 

3. Check bathrooms are stocked and that the store is presentable to customers. 

4. Clean up any messes, organize and clean up the workspace.

 5. Log into Odoo. 

6. Get money from the safe. 

7. Open a new session in Point of Sale 

8. Open “Daily Cash Report” on your computer's Desktop 

9. Erase the previous days totals. Erase the CC sales, Total and Batch #. 

10. Click here. Start counting your till. Add the correct #'s to each denomination as you move your money into the till for the day. 

11. Print, hit next 

12. In the point of sale session, enter your money count, then click "Validate" and "Open Session." 

13. Check the Delivery Schedule- if there is a delivery make sure that things are ready and it is good to go out.

14. Open the correct Scalebook corresponding with your store and the year: e.g. SL ScaleBook 2022) from Google drive, locate the “Scalebook” and “Inscale” page tabs for the current month, e.g. “November Scalebook 2022” and “November Inscale 2022.” 

15. Put the new date on the scalebook each day, 


More Responsibilities: 

Give the mail to the designated people it needs to go to when it comes in. 

Dust/ wipe down any areas that might need it. 

Fill the fridge with water bottles if it is running low or empty. 

Scan in Daily Deposit papers, SO’s/Delivery Request forms and attach them to where they need to be. 

Try to get reviews on google, be friendly with the customers- customer service is a huge thing as a cashier. 

Stock shelves if needed with tools in backstock, weed barrier pins, SB products, etc. 

Take out trash if need be. 

The Scalebook is covered in detail in another module.

CAS 205: American Stone Point of Sale (POS) System
In this section, we'll cover each of the steps of checking out using point of sales (POS). After you’ve reviewed the process in this video, print the POS guide attached here. Remember a POS transaction immediately transfers possession of product to the customer. This is generally for retail customers picking up product from the store and taking it with them. For deliveries, or pre-paid orders, we use sales orders, not POS. In other words, you’ll create POS transactions customers who: 1. Are taking their product with them (right now. Even if it’s an hour from now, you’ll create a sales order). 2. Don’t require a detailed receipt. Be sure you’re logged into 173.10.31.103:8069 -- or as directed -- with the store cashier username and password. You can double check you’re logged in correctly because the username is found here in the upper-right corner of the screen. Next, Click Point of Sale … then Orders. Click Create. Under “Customer,” enter the Salesperson who helped out the customer. If you are instructed to check out contractors using POS, say when the store is busy, instead you’ll enter the customer’s name in this field so their purchases can all be tracked together. Under Products, you can start typing and then click from the drop-down, or click Search More to find a more complete list. You’ll enter the Quantity. Select Unit of Measure (UOM). The options for unit of measure for any particular product appear in the drop-down. If you’re entering the weight of the customer’s product, you’ll use our online Scalebook spreadsheet to log and calculate this weight. We’ll cover this in more detail later. The unit price for the product appears. Save the transaction. Click Payment. And in the pop-up, select the Payment Mode (Method). Then, click Make Payment. Finally, you can print a receipt for your customer. This concludes our POS video. Now, download and read the attached PDF and complete the quiz. Up Next: Visit our Sales Order module.
CAS 206: Closing POS and the Store
Check to ensure all day-time tasks were completed. If not, you are responsible for completing them. Please finish these leftover tasks. We don't like finding things the next day! See the Scribe in External links -- BELOW THE QUIZ -- for a visual on how to accomplish these steps. 1. In POS, make sure you're logged into your store's cashier account. 2. Click "Point of Sale" tab, then "Active Sessions," then the "Close" button. 3. Click in the Cash Closing Person field and enter your name. 4. Click the closing balance button. Add 1 penny in the penny row, and 2 one hundred dollar bills in the 100 dollar row (total will be $200.01) and click confirm. 5. Click the Take Money Out button, the reason is “Closing” and the amount is $.01. Click the Take Money Out button again. Open Daily Cash Report & Bank Deposit Slip on your Desktop. 6. Go back to the Closing Balance button, delete the single penny you added previously and click "Confirm". 7. Once everything is balanced to $200.00 click the "Validate Closing & Post Entries" button and "Save". 8. After closing POS, then count the cash and enter it into the "Daily Cash Report." If you have over $200.00 in the till then it will give you a total that you have to make a deposit out of. 9. To make the deposit, there is an Excel Spreadsheet that you’ll fill out with the amount you are making the deposit for. 10. Print two (2) copies of the deposit slip and one (1) copy of the daily cash report. 11. Place one slip into the deposit bag and the other with the cash report. These go into your manager's box. Lock the back doors. On the VISA machine, press Reports, then Totals Report and Detail Report. Go Back to the home screen and press More, then Settlement. Wait for report to finish. Attach reports to the stack of Visa slips, then with the 2nd copy of the deposit slip, put it into your manager's office. MAKE SURE ALL WINDOWS ARE CLOSED & BUILDING IS SECURE. Check to make sure no one is in the building and if there is, make sure they have a key to lock up or they should either leave with you or go out the back doors.
CAS 210: Customer/Contractor Pricing Levels
What are they and when do they apply
CAS 211: Intro to Uhaul / Uhaul University
How to access, navigate and complete
CAS 212: File Management in Location / Retention Schedule

Record Retention Effective Date: January 12, 2023 
Introduction 

In order to maintain compliance and ensure that our records are properly managed, it is essential to follow the record retention policies outlined below. Proper adherence to these guidelines is crucial for effective record-keeping, auditing, and legal compliance. 

Record Retention Guidelines 

1. Bills of Lading (BOLs) Retention Period: 5 years Description: Bills of Lading (BOLs) are critical documents that provide proof of the shipment and receipt of goods. They should be retained for a period of 5 years from the date of issuance to ensure that all shipment records are available for reference, audits, or any potential disputes. 

2. Driver Records Retention Period: 3 years Description: Driver records include various documents related to the drivers employed by the company. This may encompass: Driving licenses Medical examination reports Training records Any infractions or incident reports These records should be maintained for 3 years from the date they are created or last updated. This ensures compliance with transportation regulations and helps in managing driver qualifications and performance. 

3. Receipts Retention Period: 1 year Description: Receipts are essential for tracking transactions and expenses. They must be kept for at least 1 year to support financial reporting, audits, and expense claims. This period allows for the verification and reconciliation of transactions within the company's financial records. 

4. Vancouver Location Receipts and Banking Records Retention Period: 7 years Description: For the Vancouver location, receipts and banking records are to be retained for a period of 7 years. Summary Adhering to these record retention policies helps maintain organizational efficiency, supports regulatory compliance, and protects the company in legal matters. Make sure that all relevant records are properly filed and stored according to the specified retention periods. BOL's - 5 years Driver Records - 3 years (what types of records) Receipts - 1 year Vancouver is keeping receipts and banking for 7 years

CAS 301: Adding a Retail Customer in Odoo
How to add a new retail customer in Odoo
CAS 302 Check/Refund/Military Disc. Policies
In this module you will learn when we can accept a check, our refund policy and what our military discount is
CAS 303A: How to do a Point Of Sale from start to finish
Creating a POS Order- For Retail Customers To create a POS- make sure you are on the American Stone link that is the 173 link Click Point of Sale, Orders, and Create (blue button). In the customer tab, pick the salesperson the customer was working with. If the customer didn’t work with anyone, list it under a manager. On the Products Tab, line items add the customer's products and weights. Click save, then click payment, and send it off to the Genius Machine.
CAS 303B: How to Sales Order / What "Stage" This is
Creating a Sales Order- For Contractors First starting out an SO, it can be made under your own Odoo account log in. Then click on the sales tab and click on the “Orders” subcategory, then click create. In the customer line enter the contractors account name. Add in the products the contract is getting. Then save and confirm the sale, or you can click “Confirm & Transfer”, if leaving this day. In doing that will bring you to the next page and you create the invoice and get the sales order number. After creating the invoice you’ll come to the page on what you’re trying to invoice. Always leave it marked as you want the “Invoiceable Lines.” Then click on the button that says “Create and View Invoices.” Then you’ll come to the “Invoice” page. Click on Edit, then add the day the product is being taken and then transfer and pay if the customer is taking all of the product or a partial transfer (Start on step 11) if they are only taking some of the product today. You’ll come to the last page that is registering a payment. Send it to the Genius Machine and then Validate.
CAS 303: Checking Out Customers: SOs and POS
Welcome This course covers the basics to get you started whether you’re a cashier, office admin or any American Stone employee, because everyone needs to check out customers from time to time, and especially when the store is busy. To check out our retail and contractor customers you’ll learn when to use each of these types of transactions: • SO (sales orders), and • POS (our point of sale system) Test Database Anytime you're practicing transaction, you can do so in our test database. You'll go to the Test Database link in External Links and select ept_test_latest from the database options. If you have trouble with your credentials, you can ask HR or technical support (Alex Johnson) to reset them. Introduction: SO vs. POS We have two types of customers: 1. High-volume customers with accounts 2. Retail Customers Our customers with accounts include contractors and distributors, and they receive discounts for their volume buying. Our less frequent retail customers don't have accounts or receive discount pricing. You'll use our POS (Point of Sale System) to check out retail customers who are able to take possession of their product immediately. You'll use a SO (Sales Order) to check out any customer, whether contractor or retail, who cannot take the product right away, for any reason, like they have a delivery, there are stock issues, they’re coming back later in the day, they’re making multiple trips, they have a special order, uncertain weights, etc. You’ll use either POS or a SOs to check out contractor customers taking immediate possession depending on what your supervisor advises. There are advantages to each method. Quick Transaction? SO ... NO POS ... YES Detailed Receipt? SO ... YES POS ... NO Easy to Reset? SO ... YES POS ... NO A POS transaction is quicker. The moment you create a POS, you immediately transfer ownership of the products to a customer. When you create a sales order, you don’t actually transfer ownership of the product until you’ve validated the invoice. Sales Orders provide a more detailed, professional receipt that most contractors expect, including their name and pricing level. If you make a mistake – wrong price list, wrong salesperson, wrong product – it’s very easy to reset a Sales Order to a quote. POS transactions usually must be cancelled and refunded. However there are a few people in the company with permission to reset a POS to draft. Cashiers open two Odoo sessions with two different addresses (or “URLs”) on separate tabs for each type of transaction, a Sales Order (SO), or point of sale transaction (POS). 1. For a SO you’ll log into American-stone.com using your own personal login. 2. For a POS transaction you’ll log in at this address --- 173.10.31.103:8069/web/login -- with the store’s cashier login credentials. If you have your own computer, you should bookmark these in your browser. Notice that for each different session, not only do you have a different address, you use different credentials. You’ll use your personal username and password for Sales Orders. You’ll use your store’s cashier login for Point of Sale transactions. On another tab, you should also have the Scalebook open, so you can log and calculate customer loads. This concludes our intro to the Cashier Crash Course. Please visit the POS module next in this course.
CAS 304: How to Do Manual Payments
1. Log into TSYS 2. New Credit Card Sale 3. Type in credit card # 4. Input expiration, CCV, name, and zip code 5. Invoice number is the SO number 6. Type in subtotal and tax (if applicable) 7. Hit submit 8. Click email or print receipt
CAS 305: What is a Quote / How to Create One
1 Navigate to https://www.american-stone.com/web?#view_type=list&model=pos.order&menu_id=433&action=588 2 The purpose of just creating a quote is because some customer or contractors need just that... A "quote". Quotes are good for 30 days. The goal is to turn this quote into a commitment and then we could "confirm" this quote into a sales order. This quote gets followed up on and managed by the sales person. 3 Click "Sales" 4 Click "Quotations" 5 Click "Create" 6 Click the "Customer" field. 7 Enter the business name 8 Click on the Business' name 9 Click "Add an item" 10 Look up the product and select it from the drop down menu 11 Enter the weight/quantity 12 Click "Save & Close" 13 Click "Save"
CAS 306: Invoicing
CAS 306: Invoicing

In this module you will learn how to create an invoice and register a payment. 

CAS 307: Where & When to Enter a Customer Payment
Entering and recording payment via Odoo 1 Navigate to https://aws.american-stone.com/web?#view_type=list&model=res.partner&menu_id=172&action=50 2 Go to Invoicing. Click "Customer Payments" 3 Click "Create" 4 Click the "Receive Money" field. 5 Click the "Partner" field. Add in the name of the customer paying. 6 Click the "Payment Amount" field and change it to the amount the customer is paying. 7 Click the "Payment Journal" field to change it however they are paying: credit card, cash, check, etc. 8 Click "Genius TSYS - SL (American Stone Sales, Inc.)" 9 Click the "Warehouse" field. 10 Click "Salt Lake - American Stone" or whatever location you are at. 11 Click the "TSYS Manual Payment" field if it is a manual payment. 12 Click "Save" 13 Click confirm, and then you are finished.
CAS 308: From Quote to Invoice

Doing an entire sales order from start to finish 1 A sales order is part of the process to complete a sale with a customer or contractor. The "quote" is the first stage. If there is a commitment on the quote then we can "confirm" that quote into a sales order. In general, this means that the customer has paid some or all the money towards this order. If this order is also leaving the building (either pickup or delivery) at the same time as the commitment was made for the sales order then we would move on to invoicing it. If the commitment was made, but the products are leaving later, either in pickup or delivery date, then we leave the sales order but invoice it later when the products leave the building. 2 Navigate to https://www.american-stone.com/web?#view_type=list&model=sale.order&menu_id=252&action=324 3 Click "Sales" 4 Click "Orders" 5 Click "Create" 6 Type in the customer making the purchase. If they are a new customer/contractor refer here: Contractor: Customer: https://scribehow.com/shared/How_to_create_a_retail_customer__UlvxmPRyQgWrp8bqhJb3AA 7 Click "Add an item" to add the product they are purchasing 8 Click on item 9 Enter the amount they are purchasing. Pay attention to the units on the item; lbs, sq ft, each, lineal feet, etc. 10 It should look like this. 11 Click "Save & Close" or "Save & New" if another item is being purchased. 12 Click "Save". This will create the SO and save it as a quote with a number associated with it. 13 Stopping here will create a quote. 14 Click "Confirm Sale" if they are immediately purchasing the product or putting a down payment. 15 Confirming the sale will create a Sales Order 16 FOR DELIVERIES OR DEPOSITS/DOWN PAYMENTS USE THE REGISTER PRE-PAYMENT OPTION. How to push through an order w/ a registered pre-payment:https://scribehow.com/shared/How_to_Create_an_Invoice_for_a_SO_w_a_Registered-Pre-Payment__FTGLec_MSua2ZjIYgDbvjA How to here:https://scribehow.com/shared/How_to_Register_Pre-Payment_and_Make_Manual_Payments_in_American-Stone__uRRDY95-RdCjUBDCJesMnw 17 Click "Create Invoice". 18 Click "Create and View Invoices" 19 Click "Edit" 20 Click the "Invoice Date" field. 21 Typing in "T" will invoice for that day. 22 Click "Transfer & Pay" 23 Click "Genius TSYS - (American Stone Sales, Inc.)" and select your specific store to sent the payment to the card reader 24 If the payment is taken through recurring billing, or through the virtual terminal, it will be a manual payment. This will not send it to the card reader but will register a payment in Odoo. How to here:https://scribehow.com/shared/Accessaccountdetails_Workflow__abPyQbNzTjuH8rF1hou9hw 25 If they pay in cash you can type in your store and it should pop up. 26 Validate the payment to send to card reader, or to show a manual or cash payment has been made. 27 Click "Save" 28 Click "Print" 29 Click "Invoices" 30 Print the invoice from this page because it includes our policies, this helps avoid confusion on return dates, restock fees, etc. 31 Once you hand the invoice to a customer, the sales order is done!


CAS 309: How to Fix a Sales Order

If an SO is invoiced and we have to make corrections how do we do that 1. Find the sales order that is needing to be fixed 2. Click "Invoices" 3. Click "Reset to Draft" 4. Click "Cancel" 5. Go back to SO order page 6. reset the SO to draft and cancel 7.Fix whatever is needing to be changed on the invoice. Ex: Amount of product that was taken, invoice date, salesperson, etc. 8. Click "Confirm" 9. Click and create a new "Invoice" 10. Click "Transfer & Pay" 11. Then make sure to reconcile the payment since it has already been paid for & any additional actions needed are made

CAS 310A: What to do With SO That Needs Pulled / Ordered SN & SLC
What to do with an SO to make it ready to pull in SN and SLC
CAS 310: VC - What to do With Order That Needs Pulled / Ordered

This module covers the process for managing and fulfilling orders at VC. It includes guidelines for handling products that need to be ordered, pulled, drilled, or scheduled for delivery. Key points include: Order Handling: Products requiring special orders are noted, with most ordering tasks managed by salespeople and managers. The primary focus is on the “To Pull” Board, used for tracking orders ready for pickup, delivery, or drilling. Process for the “To Pull” Board: Orders are printed with a Sales Order (SO) that includes notes on pickup or delivery dates, special instructions, and other relevant details. This board helps organize and track the fulfillment process, including any special requirements and staging information. Delivery Board: Once an order is fully processed, the SO moves to the Delivery Board located in the cashier area. This board manages the final delivery logistics and ensures orders are prepared for the designated delivery date. Overall, this module ensures efficient order processing, clear communication of special instructions, and proper tracking of order fulfillment and delivery.

CAS 311: Pre-Payment Function on Sales Orders

In this module you will learn how to register a pre payment for a sales order. 

CAS 312: TSYS Recurring Billing Setup
1 Navigate to your stores TSYS 2 Sign in 3 Click "Recurring Billing" 4 Click "Add New Customer" 5 Type in the name of the company 6 Put the name of the cardholder. We also put the CVV or security code here. 7 VC saved card info: We are putting CVC codes in the internal notes on the customer card. 8 Type in their email. This makes it easier to send receipts. 9 Put in their phone number 10 Put in the billing address. 11 Add Customer 12 It will take you to this page, click Add a New Card. 13 Type in card info, the customers name and address should automatically apply. 14 Click Save Card, and you're done!
CAS 313: Recurring Billing Customer Sale in TSYS
Creating a payment via recurring billing in TSYS
CAS 314: How to Check for Customer Credit Terms & What to do
1 When a customer is on credit that means they hold a credit line of a certain amount on their profile. They do not pay when they pick up their order and will be billed an invoice that they will send to accounting. This Bill must be paid within their agreed time. 2 Click "Sales" 3 Click "Customers" 4 Click "Customers on credit by sales team" 5 You can search up the name of the customer or find them through which Sales Team they are assigned 6 Select which customer 7 Sales & Purchases tells you their credit limit 8 This customer has a $4,000 credit limit 9 Invoicing tells you the payment terms. This customer has to pay ten days after they are invoiced. The invoice date is really important, do not go off when the SO was created. 10 To find if they are on credit from a Sales Order, click on customer 11 It should send you to the exact same screen 12 If they are on credit and once they have the product, push the order through until the invoice is "Ready for Payment". Then email the invoice to the customer and log a note that it's been sent.
CAS 315: Process of How to Correctly Rent Out the Rental Truck

This is how to rent out the rental truck. Rental truck requires a 100$ deposit. Customer should fill up the gas to the same spot it was when they started the rental.

CAS 316: Getting Contractor Pricing Based off an Already Existing Acct

In this module you will learn how to look up pricing for a specific contractor.

CAS 317: Creating A Call Log For Sales Promotion
How to log a call in the system when talking to a customer
CAS 401: How To Add A Delivery To An Order
Process of knowing which truck will be needed and how to correctly add the necessary items to the quote or sales order.
CAS 403: Logging Calls

How to log Calls in Odoo

CAS 406: Entering Contractors in Odoo
Using your State Licensing web site to find, save & attach license information to customer card. Navigate to 'Customer' tab under 'Sales' Click the 'Search' field Find the customer card you are to verify or update Use your states Department of Revenue site to search for the business Click 'Business Lookup' Type the business name Click on the business you are looking for Find the reseller permit tab and click on it to see the 'Active' dates Right-click here to save the document as a PDF and save Now go back to the customer card and attach the permit you just saved. Also log a note that the permit / license has been verified or updated Update / add the date the permits expire to the internal notes of the customer card
CAS 501: How to Do an Internal Transfer
Learn how to push an internal transfer through in Odoo.
Cas 506: Clearance Items
Products that have not sold or have lost their original state — either by time or because they have been damaged — should be moved to clearance. Let’s imagine that the product was 3200 lb. pallet of 1” Hickory Select that got run over by our front-end loader and now it’s “crushed rock.” We are still going to sell it as Storm Mountain 3” Patio. We’ll weight the product, we’ll move it to the clearance section, but then we have to move it in Odoo. We’ll do what we refer to as an “internal move.” Any employee has the permissions to do an “internal move.” You’ll go to Inventory ... Internal Moves, then click Create. In this example, for Source Location, we’ll select Salt Lake Stock, for Destination Location, Salt Lake Stock/Clearance Area. Select today as the Date, there is no BOL (Bill of Lading). Lower down on the page, under the Operations tab, under the Product column, click “Add an item” and in this example, Hickory, 1” Select. Since we’re selling 3200 lbs. for $250, we’ll divide $250 by 3200 to calculate a price of 0.07813 for each pound, which we’ll enter under the price. Click Save, then Mark as Todo, then Force Availability, then Validate. The price will appear as rounded to the penny, but it will actually calculate the price at the price you entered. The cost of the item is calculated the 80% of the price you’ve entered, that is, with a 20% margin. It’s not the actual margin, because sometimes we’re actually paying our customers to take it. But it serves for commission purposes, so salespeople makes something on the sale regardless. Now, selling a clearance item is also a bit different than a standard sale. Just as with any Sales Order, you’ll go to Sales ... Orders ... Create. Enter the customer’s name. If the customer is taking the product now, you can enter the “Cash” account of the salesperson. Click “Add an item,” the product. If the “Not enough inventory” box appears, click OK. Enter the “Ordered Quantity” (before the next step). And now, click the “Transfer from Clearance Location” box. Note: this checkbox will not appear if the product is not in clearance. In the Purchase Order Unit Price field, the new clearance price should populate. It it does not, manually enter it correctly. When you save the dialog box, back on the main new order screen you should see the item marked as “Transfer as Clearance Location” on a column where Toby is pointing (on the video). To move clearance items, cashiers can call all retail customers on our loyalty lists and advise them or our promo. When reviewing items in clearance, or moving them to clearance, make sure product is priced correctly. For salespeople, you are welcome to suggest items that should be moved to clearance because they aren't moving well enough. When you have a customer that is a hesitant on a sale, and you believe the problem is price, you might suggest an item on clearance to meet their budgetary need. Salespeople should know that if you miss doing the internal move of product to clearance and sell it at a clearance price, you could miss commissions on these items.
CAS 507A: Customer Service and Creating Leads
Review the video on greeting customers and creating leads. Review with your supervisor the preferred greeting. See the "Creating Leads" section below with respect to getting customer information. For drivers, salespeople, cashiers/office admins, there is more information on customers included in the 101 courses. For dealing with job applicants remember the information is a module under Day 1. (Day 1 is a prerequisite to this course). Getting help. When you cannot answer a question, check the resident expert list, or ask a salesperson.
CAS 511: How to Order Ice Melt
This process will walk you through how to order Ice Melt through Streamline Supply along with how to receive the orders with back orders.
Cashiers BOL (Bill of Lading) Policy
Invoicing/Bol Policy “Nothing leaves your yard without being invoiced or on a BOL.” These transfer ownership of the material to the customer. It takes it out of your inventory. Nothing leaves or enters the yard without a paper trail …this responsibility is on the shoulders of cashiers. Don’t create an invoice before your customer takes possession, and it’s leaving our yard. If a purchase is already invoiced and the customer comes back a week later, the invoice tells everyone at the store that the customer has possession of it already; this invoice is like just like a receipt. Let’s say for example, you purchased something from Home Depot, you walk back in with your receipt two weeks later and ask, “I’d like to pick up my purchase.” What do you think they’ll tell you? The receipt serves as evidence you took possession already. It’s really important that we’re all on the same page: an invoice is a receipt. We use BOL's as well, when moving equipment from one location to another. Filling out a BOL Have a look at the sample BOL in external links. Be accurate, detailed and specific enough so that the next person who sees this BOL will understand exactly everything that was ordered, everything about who ordered it. If you leave anything out, you’ll create extra work -- this next person reviewing this BOL will have to get on the phone, call you, and the two of you will waste time filling in the missing information. 1- Start at the top of the page and fill the truck weights in- If you are waiting for the heavyweight while filling it out then continue onto the rest and fill out heavy weight last. 2- (Name of Carrier) is the trucking company’s name, a driver, or business 3- Write down the sales order or PO number if you have one. 4- Fill out the date that it left the lot. 5- On the left box under (Name of Carrier) fill out who the product is going to, with all of the information. You can usually find the address, and phone number on the customer card- if there is a different destination address it can usually be found on the SO or the driver will have the address. 6- On the right box under the Date, SO Number, etc. Fill out your information- Store Address and city. 7- Write down the vehicle number and if you can’t see it then you can ask the truck driver. 8- Find out what product is being taken and fill out the box that says “Kind of Packaging, Description of Articles, etc.” 9- No. Shipping units are where you list how many pallets of each product is being taken. 10- Weight is the total amount of product being taken. 11- Rate is for the lb, bags, etc. 12- Then sign and print your name in the bottom left box under star stone sales. 13- On the right side is the side for the trucker to fill out and write the date. Every paper BOL should be attached to a BOL within Odoo. First check to ensure one is not already in the system (under Warehouse > BOL), and if not create one: Click the create button; erase whatever comes up in the default and enter the number of your bill of lading. In this example, it’s the “Shipper Number” 32591. Scan and attach the white copy of the BOL within Odoo. This copy then goes to the salesperson and/or manager of your location. The yellow and pink copies go with the driver, whether it’s one of our trucks or a trucking company. The orange copy stays in the book as a permanent record. When only orange copies remain, this book gets turned back into Salt Lake accounting, so that they can go back an audit them and ensure they’ve been properly processed. When reviewing a BOL, look for a SO in the system. If more than one item, weigh them separately. Anyone should be able to identify which product it is exactly within the system. Don’t put any general information that doesn’t identify the product exactly. If you need another BOL booklet, ask accounting (and make sure they check it out in the system). What to write on the packing slip / BOL / Scale Ticket: Gross (Heavy) Weight, Light Weight (Tare), Net Weight, Date, Your signature (and your name printed if illegible). Mixed loads: you have to have the weight on each. How to get weights on individual products. Actually write the name of the product! If the driver’s paperwork is not correctly named, you will need to figure this out. Ask for help as needed.
Custom Cut Bids
Custom Cut Bids
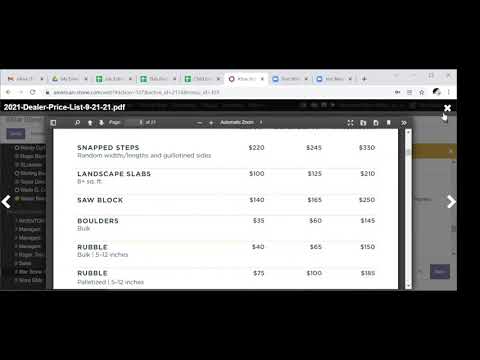
To estimate custom cut projects, you’ll use the Google doc, Job Estimator Template. To find the template, go into the American Stone Employees Shared Docs folder, then Job Bids. See the external links for this template. Make a copy of the template, and leave it in the principal folder so others can see other custom cut jobs. Note: Updates have been made to the spreadsheet template: 1. Product name is in the first column. 2. Number of pieces populates when you enter the square footage, which is typically how product is ordered, not by the piece. Copy the template and leave your bid spreadsheet in this folder. Over time, this folder will become a library of custom jobs that anyone can refer to, to see how to bid certain jobs. And this way we can go back and have a record of past projects to base more educated guesses on pricing variables. Ask for permission if you do not have it. The sheet contains tabs for estimating cut pricing for sandstone, quartzite and custom finishes. If you have a product that has both custom cuts and finishes, you will need to add pricing for both as separate line items. The fields in gold are those where you’ll enter your variables. You’ll enter the width, length, and thickness of the stone. The square feet per piece is in column E calculated by the width times length. You’ll determine the number of pieces which the customer needs, and then the finished-material total square feet will calculate in column F. In column G, the finished-material cubed feet (including the thickness) is included. The raw material price is calculated at 80% of the per-ton dealer price (Level 9), at the location you’re cutting in. To find the dealer price, you can: Look under the Odoo Discuss private Star Stone Sales channel, you’ll find the most recently issued PDF pricelist. Got to Sales ... Pricelist Items, and for Cherokee, you would start typing the product code to pull the range (ssscr11). Group by filters Pricelist and then End Date. In the video, this was 80% of $125 initially, but was then corrected to $116. The reason for this is that “landscape slabs” were selected instead of “saw slabs.” The price for Cherokee saw slabs was found not in SL but in Heber, where Cherokee comes from, it was 0.06 a lb. or 120 a ton, however we need to add in freight to Salt Lake; this made the dealer price 145 a ton, and 116 for the raw material price (also called Level 12 pricing). This works out to a total of $1,721.96 in raw material cost. Toby has calculated there will be around 55% waste, and this means that from around 30,000 lbs. of raw material, only 13,360 lbs. remain as finished product. The “Saw Cost” is a figure that includes the worker’s labor, cost of blades, and other maintenance on that saw. You’ll enter the per-piece hourly estimate. Said another way, how much time does it take for one worker to complete one piece of product in the sizes you’ve specified? If it were to take 24 man-hour to product 133 pieces, then to produce one piece would take 24/133 = 0.18. In the table, we round up to 0.2. The major variables that affect pricing are the waste you estimate and how much time it will actually take to perform the work. Estimating these correctly is something that comes with experience … going back and figuring out whether we were right later, for example, and one of the motives of the library of past projects so you don’t have to start from zero. You could start with 50% waste to start with something, and you can call the Saw Shop manager (Eric Ward) to ask him what he believes how much labor will be involved), but don’t be in a rush to get customer a price. A quick rule of thumb: an additional 6 inches in one or both dimensions will likely result in an added 10 to 15% of waste. So if you will lose 60% in a 12 by 18 cut, with a 18 by 24, you would lose 75%. Random lengths decrease the amount of waste — and greater randomness lowers it further still. It’s important to ensure you have all of the customer’s parameters on the job, and that you can present options that allow for value engineering as well. Deciding between saw slabs and saw blocks: If you are cutting top and bottom, and you don’t want seams, you want to use saw blocks. You’ll use saw slabs when the customer is calling for natural cleft (with seams). You should always get at least 2 or 3 people involved in assisting you and reviewing the pricing before issuing a bit to the customer. Remember that according to Action Selling is very last in the steps of the sale. When we refer to “the matrix” it is the third tab of a sheet that was designed originally for quoting steps and slabs. This is in external links as well. When a customer has a few custom cuts, the matrix can be used; however, the matrix has not been updated as of this writing and since it doesn’t take into account all dimensions, it can be wrong, particularly for larger cuts.
Discipline #1: Focus on the Wildly Important

Discipline one encourages you to pick one important wildly important goal, aka your WIG. You are able two pick two, but it's recommended to pick just one. While it’s hard to pick only one goal, it's necessary to eventually defeat the whirlwind. Leaders tend to want to add more goals to the list, but it’s counterproductive because focus is key to accomplishment. Humans are genetically hard-wired to do one thing with excellence. With your team and manager, you will pick a WIG and execute that WIG. To pick a WIG, first brainstorm all possible goals your team needs to complete. The WIG tends to be better and more successful when more creative possibilities are gathered. You WIG needs to be the most important thing your team deems that will make the biggest difference in your success. Make sure that the WIG you choose is a challenging but achievable goal. After you accomplish this goal, you can incorporate it into your day-to-day duties and move onto pursuing another one.

Discipline #3: Keep a compelling scoreboard

The third discipline is to make sure everyone knows their scores at all times, so they can tell whether or not they are winning. People perform better when they are keeping score. Everyone enjoys competition! As a result, this discipline revolves around the idea of engaging your team members to be their best. We encourage team members to be emotionally driven to win.

EA 410 : How to Order and Manage Pallets
In this video, I will guide you through the process of ordering and managing pallets. I will show you how to create a purchase order, select the vendor and destination warehouse, add the items and quantities, and confirm the order. I will also explain the importance of staging the pallets in our production yard and how to keep track of where they need to be delivered. Pay attention to the notes section for additional details. This video will provide valuable information for anyone involved in the pallet ordering process.
EA 703A Fish Creek Quarterly Net DMR Report
How to fill out the quarterly DMR for Fish Creek Quarry on NetDMR. Website - https://npdes-ereporting.epa.gov/net-netdmr You will have to ask Dan for the username and password. It is on a private credentials page that we do not have the privileges to.
EA 901: How to Prepare Managers for Quarterly Reviews
In this video, I discuss how to assist General managers in preparing for their Quarterly Reviews. We go over their budget, goals, assets, and other items.
Emp 101: Welcome: Our Vision and Mission

Keywords: vision, mission, orientation manual, natural stone products, beautiful spaces, living scapes, objectives, general objectives, profitable business, service marketplace.

Emp 102: Day 1 Checklist

Keywords: Lowdown document, company vision, vision, company history, history, company structure, stone types, stone, meeting schedule, job titles, Lucid, credentials, quarterly meeting.

Emp 105: Career Progression

American Stone, Retail stone sales, Manufacturing stone products, Stone maintenance, Corporate support services, Stone yardhands, Stone cashiers, Stone salespeople, Stone drivers, Inbound sales, Outbound sales, Sales pros, Utah stone locations, Vancouver Washington stone store, Idaho mechanic shop, Stone splitters, Stone production crew, Stone quarry operators, Oakley Idaho saw shop, Salt Lake saw shop, Quarry management, Stone production Salt Lake, Stone production Oakley, Human resources in stone industry, Accounting in stone business, Stone industry executives, Marketing for stone products, Retail career advancement, Manufacturing career advancement, Maintenance career advancement, Corporate office career growth, Stone yardhand to driver, Stone mechanic career, Saw shop positions, Stone splitter to operator, Quarry foreman roles, Tuition reimbursement benefit, Leadership training in stone business, Quarry management roles, Corporate office roles, Accounting clerk advancement, Intermediate accountant roles, Chief financial officer stone company, Human resources growth, Stone company managers, Dan Thomas president, Roger Boyd vice president, Johnny Prieto mechanic lead, Eric Ward production manager, Ismael Martinez PSL shift lead, Blas Ocampo PSL second shift, Fernando Rodriguez Oakley manager, Rex Larsen quarry manager, Alberto Castañeda assistant quarry manager, Toby Winchester GM Salt Lake, Jeff Moore GM Sunset, Michael Harhi GM Heber City, Jason Jeffs GM Vancouver, Cynthia VanBibber HR manager, Bev Thomas CFO, Jerry Thun controller, Alex Johnson accountant, Clarissa Thomas corporate admin, org chart, organization chart.

Emp 112: Internet Best Practices: Avoiding Online Scams

In this module you will learn how to browse the internet safely and learn about online threats and scams.

Emp 201: Basic Safety and GBCare
Keywords: Orientation, GBCare, injury reports, company documentation, Employee Orientation Manual, Employee Agreement, Consent Form, photo, employee contract.
Emp 202: Proper Safe Lifting Technique

Lifting heavy items, workplace injury, shoulder injuries, back injuries, missed workdays, Bureau of Labor Statistics, overexertion, cumulative trauma, bending, twisting, turning, back injuries, strains, sprains, improper lifting, carrying heavy loads, manual material handling, smart lifting practices, back sprains, muscle pulls, wrist injuries, elbow injuries, spinal injuries, safe lifting techniques, material handling, lifting stages, preparation for lifting, load planning, mechanical means, hand trucks, personal protective equipment, safe handholds, lifting techniques, proper posture, carrying techniques, setting down techniques, fatigue prevention, push vs pull, power zone lifting, manual lifting hazards, weight of objects, mechanical assistance, ramps for heavy items, power zone, order smaller quantities, limit weight to 50 pounds, two-person lifting, awkward postures, bending and lifting, back stress, muscle fatigue, store materials at power zone height, truck bed roll-out decks, high-frequency lifting, long-duration lifting, muscle recovery, rest breaks, job rotation, teamwork in lifting, inadequate handholds, handle-free boxes, grip tools, protective gloves, contact stress, lifting tools, environmental factors, extreme temperatures, low visibility, proper lighting, material handling safety, dehydration prevention, heat stress, cold temperature hazards, safe lifting

Emp 203: More on Personal Protective Equipment (PPE)
Keywords: Safe, Environment, Personal protective equipment, protective, equipment, yard equipment, gloves, PPE, job hazards, safety culture, OSHA regulations.
Emp 205: Liability and Incident Reports and Customer Property Damage
Keywords: Incident, Reports, damage disclaimer, customer pre-warning, loading risks, customer satisfaction, accident steps, manager approval, upper management, accident avoidance, incident report.
Emp 207: Fire Prevention
Keywords: team effort, fire prevention, designated smoking areas, flammable storage, electrical safety, fire extinguishers, fire classification, emergency procedures, fire department contact, fire response.
Emp 208: Robbery
Emp 208: Robbery
Keyword phrases: What to do in case of an emergency, suspect description form, incident form for robberies, robbery prevention, safety when leaving, opening, closing safety, loitering customers, suspicious behavior.
Emp 301-I: Odoo v17 Intro – Internal Users Guide
Keywords: Odoo inbox messages, Clocking in and out on Odoo, Correcting timesheet errors on Odoo, Checking payslip on Odoo, Submitting timesheet in Odoo, Finding co-worker contact info on Odoo, Reviewing job details on Odoo, Viewing earned badges on Odoo, Updating email address in Odoo, Changing profile photo on Odoo, Sending messages within Odoo, Accessing monthly schedule on Odoo, Leave request in Odoo, Discuss main menu in Odoo, Odoo primary menu navigation, Odoo secondary menu usage, Clocking in and out process on Odoo, Timesheet management in Odoo, Handling timesheet errors in Odoo, Payroll process in Odoo, Accessing payslip in Odoo, Viewing employee information on Odoo, Badges and achievements in Odoo, Completing self-appraisal in Odoo, Requesting leave in Odoo, how to log in and view your payslip, check your payslips.
Emp 403-I: Projects and Tasks

This shows you how to create, organize, and utilize projects and tasks for work.

Emp 501: American Stone Benefits

Keywords: Health Insurance, dental and vision insurance, vacation pay, mobile line plan, bereavement leave, Future Plan 401(k) plan, Benefits, MedShopper, telemedicine, Legal Shield, employee discount, health insurance.

Emp 502: Health Insurance and HSA Contributions

Keywords: Allstate health insurance, health insurance eligibility, High-deductible health plans (HDHP), HSA, Health Savings Account Contributions, Employee health insurance enrollment, Dental and vision insurance options, Allstate Plan 3 vs. Plan 4 comparison, Health insurance coverage details, Preventive care covered 100%, Health insurance qualifying events, Health tax benefits, co-insurance percentages, Out-of-pocket maximums for health insurance, Coinsurance percentages, Employer-sponsored insurance, Dental insurance immediate coverage, Vision insurance paired with Dental, Medical expense tax deduction, Health insurance open enrollment period, COBRA continuation coverage information, Group health insurance pricing updates, premiums, PPA preferred physicians.

Emp 504: American Stone 401(k)

Keywords: Eligibility, enrollment dates, 401(k) retirement, employer contributions, early withdrawal, hardship exceptions, rollover form, Future Plan login, loan.

Emp 509: LegalShield and IDShield

Keywords: LegalShield, IDShield, Commercial Driver's Legal Plan, CDLP, CDL, identity theft protection, legal protection, DOT violations, overweight citations.

LegalShield, IDShield, CDLP, CDL, protección contra robo de identidad, protección legal, infracciones DOT, multas por exceso de peso.

Emp 607: Our Natural Stone Products

Review the product guide in external links at the very bottom of this page, and answer questions about what you've learned.

Emp 612: TSV (Thin Stone Veneer)

Thin Stone Veneer is pure, natural stone cut into thin flats for making surfaces uniquely beautiful. Thin Stone Veneer maintains the natural beauty and texture of the stone just as it was when it came out of the earth. We trim off the back side of the stone making a thin strip for easy and uniform installation. Simply put, it’s a thinner cut of building stone aligned into an array of patterns to achieve a wide variety of looks. See external links. Alpine = mosaic Castlerock = builders Promontory = anything with a sawn edge Sawtooth = natural ledge Wasatch = squares and recs

Emp 801: Systemology Stage 1 - Define

Goal: Intro to Systemology and the CCF Systemology is a course that teaches about how to identify and improve systems within a business. A system is a series of steps that, when followed, produce a predictable outcome. Some examples of systems are a morning routine, working out, and eating. In this course, you will learn how to identify the systems in your workplace, find the areas where they are not working well, and make improvements so that the systems are more efficient and effective. The goal of systemology is to create a business where all the systems are working together to produce the best possible results for the company and its employees.

Emp 806: Systemology Stage 3 - Extract Pt 3
Goal: gather all the recordings and prep them for urock
Emp 809: Systemology Stage 5 - Integrate
Goal: Change the culture - direct to modules
Emp 902-1: Installation Guide: Softphone App on iPhone

This guide provides detailed instructions for installing and configuring a softphone application on an iPhone. It is intended for end-users or IT staff assisting with VoIP/telephony setup

Emp 902: How to Set Up a Softphone on an Android Cellphone

This guide walks you through selecting, installing, and configuring a softphone on your Android device.

Give Feedback
Give Feedback
To report errors, and give feedback, please click this link to email us.
IT 201: OpenOffice Installation-Basics
In this video, I will guide you through the installation process of our basic software for Open Office. I will show you how to download the latest stable version for your operating system and explain why it's important to choose the right version. Once downloaded, I will walk you through the installation steps and demonstrate how the software associates with various office-style documents. Please follow along and let me know if you have any questions.
IT 204: Preferred Hardware
Our company uses specific hardware that has proven its reliability, durability and low cost. In the external links you will find an active live document of our preferred hardware that is updated yearly as tech grows and evolves. Before purchasing any hardware, be sure to refer to the list.
IT 508: CO Server Room Layout Map
In this course you will learn where things belong in our corporate office server room. This room should be maintained monthly and kept clean. Everything should be in its proper place. To ensure this, use the map below or the physical map in the room. This allows for the IT team to quickly and effectively get what they need for the various tasks they are responsible for.
IT 614: Bluehost - Setting Up Subdomains on Bluehost

In this video, I walk you through the process of setting up a subdomain on Bluehost, including how to access your account and manage domain settings. I provide examples of existing subdomains and explain how to create a new one that points to a hosted site, specifically for our Odoo test database. I also highlight the importance of adjusting the IP address and managing load times effectively. Please make sure to follow the steps carefully and let me know if you have any questions!

IT 701: Go Daddy Website Domains , Forwarding nameservers , login , etc.
In this video, you will learn how to use Go Daddy website domains, forward nameservers, login, etc. 1- Go to sso.godaddy.com/login 2- Sign in using 73935512 (Username) and Stone2013 (Password) 3- Once signed in, you will see all of our domain names. 4- Click domain name of choice. 5- Click “Domain” on the left menu bar. 6- Click “Manage DNS” 7- Click “Nameservers” 8- Set up the Nameservers as ns1.bluehost.com and ns2.bluehost.com 9- Save
Mass Mailing
Mass Mailing
Templated emails are set up for you to send out to your customer contacts at your convenience. These templated messages are designated by corporate and adhere to corporate style guides. Templates that have a slim color bar in the margin are ready for you to use. All other templates are in a production stage, or are outdated and not ready for use. For a list of available campaign messages among the templates, or to make a request, visit the Google Docs link in external links below. Below are the steps to follow to send emails using the templates: 1. Select 'Sales' in the Odoo tool bar 2. Select 'Mass Mailings' in the left-hand column toolbar options under the Email Marketing heading 3. Select the email you want to use from the list of available emails that appear in the window (Note: Some of the emails will have been sent. You can still use these to send your own version of that email) 4. When the email has opened, you will see the email template in the body, and there will already be data in the "from," "subject," and "recipients" fields at the top. (You can ignore all of those for now). 5. Click on the "Action" drop-down menu option (next to the "Attachments" drop-down option) at the top of the window and select "Duplicate" **This will duplicate the email and add it to the selections from step 3 above. 6. Once your duplicate is open, you will need to change the data in the from, subject, and recipients fields. (The subject can stay the same if you want, but please remove any reference to "Copy" or "Duplicate." **You will need to be sure and change the recipients to your own mailing list, as well as who the email is coming from (most likely, from you). 7. Click on the “Options” tab and update the “Reply To” field to the email address you would like your customers to respond to should they click to reply to the email. By default the address will be be ‘sales@american-stone.com' or the email address of the person who created the template. 8. Email body: This content may not need to be changed, however you may want to change a phone number in the email body if you want the recipient to call a specific number, or change an email link if you want the recipient to reach a specific email. For example, a 'Get a Quote' link in the email may have a link to an email other than one you would like it to link to. If that is the case, please feel free to change the link email. **The body of the email will be fully editable. We do not recommend making any major changes. Please consult with Marketing if you have major change requests. 9. Once you are done adding your own information to the subject, recipient and from fields, and you are satisfied with the information in the body of the email, you can SAVE your email and then you are ready to send it.
MKT 145 Social Media - Create Pinterest Pin
Access Your Profile: Log in to your Pinterest account and navigate to your profile page. Select Pin: Choose the "Organic Create" pin from your profile. Upload Image: Click on the "Choose a File" button to upload the image you want to use for the pin. Select the desired image from your device. Add Title: Enter a simple, descriptive title for your pin in the field. Add Description: Write a detailed description for your pin. Include additional information or context about the content of the pin. Insert Link: Paste the relevant link that you want to associate with the pin. This could be a link to a blog post, website, or product page. Select Board: Choose the appropriate Pinterest board where you want to save the pin. Add Tags: Include relevant tags or keywords that relate to the content of your pin. This helps users discover your pin when searching on Pinterest. Schedule Publication (Optional): If you wish to publish the pin at a later date, you can set a specific date and time for publication. Publish Pin: Click on the "Publish" button to immediately post the pin to Pinterest. Alternatively, if you scheduled publication, confirm your selected date and time. Confirmation: Once published, you'll receive a confirmation message indicating that your pin has been successfully posted.
MKT 164 Request Estimate KPI's
MKT 164 Analytics - Analytics KPI's Request Estimates
MKT 165 Analytics - Creating a Yearly KPI Worksheet
How To: Create a yearly KPI worksheet
MKT 275 - Create Google Business Post / Updates
MKT 275 Digital - Update Google Business Page Posts
MKT 277 Digital - Leads to Opportunities

How To: Convert Web Leads to Opportunities

MKT 280.1 Leads from Construct Connect
Creating leads from lead magazine Construct Connect
MKT 373 Digital - Updating Google Ads with Recommendations
How To: Evaluate, Edit, and Update Google ads from recommendations
MKT 391 Director - Manage File Structure

How To: Maintain the Marketing File Structure for a Monthly Marketing Campaign

Odoo 701: How to Template for urock Module Text
Learn how to write good text for a urock module
Odoo 702: Module/Course Status and Publishing for the front end user
How to change the status of your module and publish courses and modules for the front end users use
Odoo 703: Example - How to Create a Module with a PDF
How to take an SOP pdf and make a module
QRRY 221: MSHA Personal Protecctive Equipment (PPE) English / Spanish
You have the right to work in a safe environment. Watch this video and learn about the benefits and use of personal protective equipment. You should have learned the answers to these questions in Day 1. If you're unsure, ask your supervisor: Wearing Shorts: When it’s hot, should you wear shorts? Shoes: What type of shoes should you use in the yard? Shoes: Does it matter what job you have as to what shoe wear you have on? Gloves: When should you use them, and what accidents can they prevent? Gloves: Who should wear gloves? PPE: Write down a list of the PPE required for your job on a daily basis. PPE: Are there any special activities that will require PPE you wouldn't need on a daily basis? Personal Protective Equipment (PPE) includes: • Hard hats • Safety Goggles • Hearing protection • Gloves • Visibility vest • Work Boots • Fall protection • And more It is important to choose the correct PPE for the kinds of hazards you encounter on your job. PPE must fit your body in good condition, with no cracks, tears, or holes. If you have any questions regarding the type or the quality of the PPE that is right for your job, you should talk with your supervisor. You can also consult your Company’s Employee Manual or even look for OSHA Regulations online. Wherever you work and whatever you do there should be a culture of safety in your work. Reminders: • Identify your job hazards • Choose the proper PPE • Be sure your PPE works correctly. • Make sure everything fits.
QRRY 301: Premium Patio Sizes
0:01 Welcome to Starstone. We're going over our new premium patio sizes. For all our 1, 2, and 3 inch patios, we'll be a minimum of 14 inches by 14 inches. 0:22 Our 1 inch thick patio will be 3 quarters of an inch to 1 inch. Our 2 inch patio will be a thickness of 1 1⁄2 to 2 inches. 0:33 Our 3 inch thickness will be 2 1⁄2 to 3 inches. These new sizes are for all patios, Storm Mountain, Autumn Gold, Cherokee, Buckskin, etc. 0:58 14 inch by 14 inch minimum pieces, nothing smaller, 1 inch patio. It's 3 quarters to 1 inch thick. 1:18 2 inch patio. It is 1 1⁄2 to 2 inches thick. And 3 inch patio will be 2 1⁄2 inches to 3 inches thick. 1:35 These will be all on our new patios and we'll be separate from our old existing patio. If you have any questions please let us know. 1:45 Thank you and have a nice day. 0:01 Bienvenido a Starstone. Estamos repasando nuestros nuevos tamaños de patio premium. Para todos nuestros patios de 1, 2 y 3 pulgadas, tendremos un mínimo de 14 pulgadas por 14 pulgadas. 0:22 Nuestro patio de 1 pulgada de espesor tendrá entre 3 cuartos de pulgada y 1 pulgada. Nuestro patio de 2 pulgadas tendrá un espesor de entre 1 1⁄2 y 2 pulgadas. 0:33 Nuestro grosor de 3 pulgadas será de 2 1⁄2 a 3 pulgadas. Estos nuevos tamaños son para todos los patios, Storm Mountain, Autumn Gold, Cherokee, Buckskin, etc. 0:58 Piezas de 14 pulgadas por 14 pulgadas como mínimo, nada más pequeño, patio de 1 pulgada. Tiene un grosor de 3 cuartos a 1 pulgada. 1:18 Patio de 2 pulgadas. Tiene un grosor de entre 1 1⁄2 y 2 pulgadas. Y un patio de 3 pulgadas tendrá un grosor de entre 2 1⁄2 y 3 pulgadas. 1:35 Todo esto estará en nuestros nuevos patios y estará separado de nuestro antiguo patio existente. Si tiene alguna pregunta, infórmenos. 1:45 Gracias y que tengas un buen día.
Saw Shop 101: General Education 0
Go to General Education 2 and Complete all the courses.
Saw Shop 305: How to Downsize a Boulder

Step by step on how to downsize a boulder 

SLS 203: Construction Monitor and Construction Connect
Construction Monitor Construction Monitor is the report of construction permits that have been filed along the Wasatch Front (Utah). You may open the weekly version of Construction Monitor, examine the information, and determine what you can offer or where we can be of service. Or, as of this publication, the weekly edition should be already entered into Odoo Leads, and you can examine the current edition from there in PDF or Google Sheet form. If it has not been already entered. To log in yourself, go to https://www.constructionmonitor.com/permittools/weekly Username:lead@american-stone.com Password:stone2014 (If this password doesn't work, check the Knowledge article in external links to ensure the credentials have not been updated). Try filtering by different parameters to concentrate on different objectives: Filter by Site_City if you plan on already being in the area for a site visit. Filter by Construction_Type to find projects that might have a use for stone. Filter by Permit_Description to find projects that might use stone. Filter by Builder_Name and cross reference with the information in Odoo to find new Builders. There are builder phone numbers and addresses listed for each permit. Make a list, create contacts, and log calls. Before you reach out to customers, for each call, make "Commitment Objectives" (see Action Selling Course if you are unfamiliar with this term). Construction Connect
SLS 207: FreePBX Power Dialer Setup
In this module you will learn how to export your customer list from Odoo, upload it into our FreePBX software and create your sales call campaign to call your customer base and establish or maintain meaningful contact.
SLS 301: TSYS Recurring Billing (Saved CC's)
Saving Credit cards of contractors to make more efficient for future sales, Recurring invoices, credit cards, saved credit cards
SLS 302: How to Create a Purchase Order
See the Scribe in External Links for the step-by-step process on how to create a purchase order (PO) in Odoo.
SLS 610: Forecasting Sales

Here we see how to forecast sales, or “12-month rolling forecasts.” These are due every month, by the first day of the month. Management looks at a staggered forecast report that shows how the forecasts have changed, from one month to the next for the entire year. And they can see how a department actually performs and compare this to the forecast numbers. And where we see we’re really off, we can adjust in the future so we can predict better. It’s important to be able to keep forecasts accurate. This way we can know what our cash flow is and make good decisions, for example, whether we need to hire another salesperson, or whether we need to raise or cut budgets. We’re starting with a new salesperson in this video. Randy has been with the company for 2 months, and so his sales numbers and predictions will be a lot more volatile. In Odoo, you’ll go to Sales … 12 Mo Rolling Forecasts. You can either use the default filter, with which you’ll only see your own forecasts, or search by salesperson for someone else. If you’re new, you may need to rely on others’ numbers to make an educated guess, particularly about the fluctuation in sales volume over the year. In the video, for Randy, you’ll see that for each month Randy has forecast for both American Stone and Star Stone since he will be making sales for each company. Here you’ll see we made an educated guess. Randy we predicted would make $15,000 in sales as a new sales pro in November. As contractor sales kicked in, in December and January, we believe his sales would hold at $15,000. We predicted sales would start picking up starting in February. In this example, we open the November report, and then for the next month, December, we duplicate the report so you don’t have to start completely over every month. Just update the start and end dates. The title will automatically update. Since this is a 12-month rolling forecast, you should have complete the upcoming month, until the current month you are in, for next year. After you’ve built up sales for a year, you can have last year’s numbers to work off of. And after you complete the new month, you can delete the oldest month from a year ago, and keep only 12 line items, one for each month. Click to add a line, enter the new start date (first day of the month) and end date (final day of the month) on the row (first two columns), and DO NOT HIT TAB. Your screen will lock up and you’ll have to start over. You need to click to advance to the field where you’ll enter to update your forecast number. Watching the video, you’ll see how Toby guesses the seasonal increases and decreases in sales. Forecasting is not a sales goal. This is not a stretch goal, or what you want, this is the money that you think will come into the company. If we have a huge anomaly in the last December, say, where we had a $40,000 sale, you don’t need to match the record for the following year, simply because you want management to look favorably on your numbers. It’s more important to be accurate. While your sales forecast is somewhat a guess, particularly for a new salesperson, it’s less so when you are working with customers and know with some level of certainty what will come in. Think about the jobs you’ve got in the pipeline, what the timelines are, and what the likelihood is of them going through. You can and should change this any time there’s a change. Examples include you’ve earned or lost a big job, or a job got pushed back or up. You’ll enter anything that will affect your numbers. In the video, we see on Nick Benson’s 12-months forecast, that Toby updates the forecast from $110,000 to $115,000 because while there are only 4 days left, Nick’s current sales are close to the forecast, and he has a new job that’s come in that he believes will update the forecast. To make the change, you’ll click the arrow next to the right of the forecast figure, and in the pop-up, enter the updated amount in the Planned Amount field, then click the Update Forecast button. Automatically a note at the bottom of the page will register that you made the change. Finally when you have all of your months done, you’ll come up with a yearly number. So, now click Save, and then you’ll confirm. You can also look at forecasts as a way to figure out what you want to make personally. You’ll look at the total sales you’ve forecast over the year, take the average margin, and then you can come up with what you’ll make. If this is a lower number than you want it to be, you can estimate more, but then you’ll need to work backward to figure out what you need to do to make those sales.

SOs: Immediate Transfer
In this section we’ll discuss when you check out a customer using a Sales Order. See Scribes and other resources on how to create a sales orders in Odoo in External Links (bottom of this page). Then we’ll cover a Sales Orders for customers taking product with them. After you’ve reviewed the process for what we call an “immediate transfer” SO, as described in this video, print in the Sales Orders Step-by-Step for guide you can review as you’re completing orders. A sales order is part of a longer sales process … this is so the sales can pause at various stages. For this slower process, sales can begin as leads – where we may have only the NAME of a customer who’s potentially interested. If there is confirmed interest, the potential sale becomes an opportunity. When the customer identifies products they want, it becomes a quote: the stage at which a CASHIER can pick up the transaction. The cashier could ALSO pick up the transaction after it becomes a sales order – this is the equivalent of having products in your cart – where there’s an intention to buy. This order can wait to be invoiced until which point we’re ready with the product, or the customer is ready to buy it. Once it’s invoiced, possession of the product transfers to the customer. This invoice showing paid travels with the product, and then the transaction is considered done. We use the word “transfer” to describe when product leaves our yard, when we transfer ownership to our customer. A sales order transaction can be used for either an immediately transfer – we might use the phrase: “pushed all the way through,” to refer to doing all the steps of the sales order at once … … or the sales order can be used for future transfer of product possession to the customer. So both SO and POS can be used for immediate transfers. But for future transfers you always use an SO. You’ll also complete a sales order when there is a pre-payment. If a customer has a delivery, but doesn’t have an account – that is, they’re a retail customer – you’ll create an account for them. In short: You’ll create a sales order for: • Immediate transfer of goods, and when you want to provide a more detailed receipt. Usually this is for a contractor customer. • and for Future transfer of goods; that is, your customer is coming to pick up product later, whether it’s an hour from now, or next week, or, they have a delivery. Be sure you’re logged into american-stone.com with your own personal username and password. You can double-check you’re logged in correctly because the username is found here in the upper-right-hand corner of the screen. Next determine whether the customer has an immediate or future transfer of goods. For an immediate transfer of goods, you will, 1. Create the quote 2. Confirm the sale … to convert to it to a sales order 3. Create the delivery (a delivery in this instance simply represents moving the product OUT of our inventory and staging it for customer possession); it’s not an actual delivery. 4. Create the invoice 5. and Register payment Now, let’s go into detail on each of these steps. 1. QUOTATION The first step is to create a QUOTE. This quote could already be created, in which case you’ll pick up the transaction at the next stage. If it has not been created yet – say a contractor is checking out with product they’re leaving with – you’ll start the SO from the quote. To create a quote, you will: 1. Click Sales 2. Click Orders 3. Click Create (Note: a quote can be created as well from Sales > Quotations > Create). 4. Enter the customer’s name. (Not the name of the salesperson as you usually do for a POS transaction). 5. Click Add an item. 6. In the create order lines pop-up, begin typing the product name. Select the product from the options, or click Search More to find it. 7. Enter the quantity. 8. Enter the Unit of Measure, UOM. The options for the product appear in the drop-down. If you’re entering the weight of the customer’s product, you’ll use our online Scalebook spreadsheet to log and calculate this weight. We’ll cover this in more detail later. 9. Click Save and Close. 10. Click Save. 2. SALES ORDER Next you’ll convert the quote into a sales order. For customers coming to “pick up an order,” the quote has already been created. Search for the quote, and pick up processing the sale at this stage. Click Confirm Sale. Now, the quote has become a sales order, meaning: The customer intends to purchase. You’ll also see how the quote has progressed into the sales order stage in the upper-right bar here. Also, if you need to back the transaction up to quotation, you’ll click the “Set to Quotation” button here. 3. CREATE A DELIVERY There is no delivery for an immediate transfer; but you’ll still … 1. Click the Delivery button in the upper right corner here. Instead of thinking of this as a delivery, think of it as moving the product out of inventory. 2. If the product isn’t showing up in inventory, you’ll see a Check Availability button, and if you determine to override what’s registered in inventory – and generally if the customer has the product – it’s likely our inventory is wrong – then you’ll click Force Availability. Then Validate. 3. If product is in inventory, you’ll simply click Validate. 4. Return to the main sales order window by clicking the Sales Order number in the breadcrumb series in the upper left. 4. CREATE THE INVOICE Next, you’ll create the Invoice. 1. Click Create and View Invoices. 2. Click Edit. 3. Update the invoice date to today’s date (Press t on your keyboard as a shortcut for today’s date). 4. In the memo field, you’ll note information that we need printed on the invoice. For immediate transfers, this usually isn’t necessary. 5. Click Save. (For save you can also press control+S on your keyboard). This next step transfers ownership to the customer. Before this point, the order was in “sales order” status, and the company has possession of the material. 6. Now, click to Validate the invoice. This transfers ownership to the customer. In the upper-right, you’ll see the status of the invoice is now “Ready for Payment.” This field, payment terms, reads “net,” meaning the customer doesn’t have a credit account with us, so we’ll need to take payment now: either cash or credit card. If instead the payment terms field reads “net10th” or “net 30,” the customer has a credit account. In this case you do NOT need to take payment now. You’ll print two copies of the invoice (click print here), and have the customer sign one of the hard copies. Scan in the copy and attach this to the invoice. Click Attachments to upload it. At a later date when you receive the payment, you’ll reconcile the payment, which we’ll show you in the next Future Transfer Sales Order Video. But if the customer is instead paying with a credit card or cash, you will go ahead and register the payment. We’ll cover this process next. 5. REGISTER PAYMENT Your next step in an immediate transfer sales order, for a customer who’s paying right now, is to register the payment. Before you proceed, select and copy the sales order number to your clipboard; you will paste it later. 1. Take the customer’s payment. 2. Click Register Payment. 3. Enter the payment date. Press T for today’s date. 4. Enter the payment journal. 5. In the Memo field, enter (or paste) the sales order number. 6. Click Validate. This concludes our Immediate Transfer SO video. Now download the attached PDF and complete the quiz.
SO Update, Partial Transfers, Returns
The former video on SOs is out of date. This update describes what the changes are. Additionally, you'll learn how to do a partial transfer. This is what happens when the customer needs to come back again, or several times in order to get all of their order. You'll learn about the returns policy -- what you can and cannot return -- and when you need to get a manager involved. You'll also see how you complete a return.
YH 204: Daily, Weekly, Monthy Task List

The prerequisites to this course are Day 1 and Day 2. If you have not completed these, please do so before you get started on Yardhand 101. Links to these two course are in the External Links. 


Yard Hand checklist

  • Daily Opening: 
    • Clock in within Odoo (or the Public Login). 
    • Open The front Gate. 
    • Clean the Scale
    • Inspect the Equipment. 
    • Make sure that the deliveries are pulled and the first deliveries are loaded. 
  • Primary Duties: 
    • Assist any customers, greet them and get them to a salesperson if needed. 
    • Cleanup Rows: Start with the first pallet (SE corner) and snake your way through the yard. You should be able to fix every pallet every day. 
    • Straighten pallets and make sure they are on the line and able to be walked around.
    • Consolidate Pallets less than 1000 lbs together. 
    • Remove chips from pallets and ground, palletize into landscape chip pallet or place in Crusher Pile.
    • Bring up full pallets from inventory and open banding/wire. 
    • Remove banding wire from any other pallets. 
    • Check the fountains and bubblers to make sure the water is full and the pumps are working.
    • Check signage: Get a new one if needed, make sure it’s visible to customers. 
    • Maintain bins. Make sure gravel did not fall behind or leak to other bins. Clean off rock on concrete sides.
    • Weed eat, pull and/or spray any weeds or grass in rows. Prune shrubs and plants. Spray Roundup on ½ the yard (or where applicable) Mow the front lawn. Blow the pavement. Water grounds.
    • Clean up spills and trash throughout the day. Check the bins for trash too. 
    • Maintain boulders. 
    • Maintain Displays, Walkways and Patios.
    • Pick up rock around features. Fix loose rocks. 
    • Make sure the dumpster is not over flowing. Smash it down if needed.
    • Turn bark. Hose down bark. If applicable
  • Closing  
    • Park equipment in the correct location. Place all the equipment in the Saw shop if it is Cold or raining. 
    • Close and lock the gate if you are the last one.
    • Clock out in Odoo (or using the Public Login). 
  • Monthly 
    • Clean out under the scale. 
    • Pressure wash equipment.
    • Clean out the Sold/Hold section (also called "Will Call"). 

YH 301 Stacking Pallets and Bin Clean up

Stacking Pallets / Presenting Pallets to Customers 

Learn how to stack a stone pallet, how to load a hopper, and how to keep bins clean so you can easily drive a forklift into them. 


  • When you're stacking a pallet, you want to start with the perimeter, and make sure nothing is hanging off the edges. 
  • Then you'll fill in the center. As you're laying the rock down, be sure to bend at the knees to protect your back. Lift with your legs. 
  • When you lay down each layer of rock, stagger, or straddle rocks so each is supported by two or three rocks. 
  • Avoid stacking the pallet where you have runs of rock that run vertically one on top of the other, because this could make the pallet liable to topple. 
  • Stack the pallet until it's waist-high. 
  • When you're restocking new pallets, remove the chicken wire so the customers can access them. 
  • After you cut the chicken wire off a pallet, take it to the designated area. 


Loading the Hopper / Trucks Loading 

The hopper is great practice for loading trucks. 

  • You want to make sure you're close enough to get in, but not so close you hit the edge. 
  • In the video we see how our driver got close to the hopper but didn't touch it so he wouldn't damage it. 

Keeping Bins Clean 

Eddie presents a bolder bin in the video. 

  • We lift the boulders with a forklift, and so all of the debris and loose gravel will get in your way and make it harder to get a forklift in the bin. 
  • Whenever you have downtime, you can grab a hopper and start cleaning up to make your time easier, when you want to get at the boulders.
YH 402: Front-end Loader

Wheel loader, front end loader, bucket loader – different names, same type of machinery. 

How to operate a Komatsu WA270 wheel loader. 

  • This particular Komatsu WA270 has an operating weight of 28,164 to 29,299 lobs, a horsepower of 149@2000 RPM, and a bucket capacity of 2.5 to 3.5 square yards. 
  • You'll make sure that you have three points of contact when you get into the loader. 
  • Be sure to lock the door all the way open. While you can leave the door open, it's recommended that you close it. 
  • Next you’ll put on your seatbelt. Start the equipment and make sure there are no warning symbols. 
  • They controls are similar with different brands of wheeled loaders. Adjust the seat so that you are comfortable. 
  • This particular loader has a steering wheel (which is typical) that you will manage with your left hand, and with your right hand you will be operating the joystick tool-control, for your boom and bucket control. Larger wheel loaders may have a second joystick and the left hand instead of the steering wheel. 

There are two ways to shift the Komatsu wheeled loader. 

  • To the far right is the controls to adjust which configuration of shifter you’ll use, the left or right shifting options. 
    • For the right configuration there’s a button on the joystick that sets to forward, neutral or reverse. 
    • There’s also a shifter on the left side of the steering column; pushing it away from you is “forward,” and away if “reverse.” 
      • Typically Randy teaches new operators to shift with the left hand option, so that the right hand can be dedicated to tool control. But a more advanced operator might do everything with the right thumb. 
    • Also on the right by the shifter configuration are the traction controls. Randy has this set to automatic, a good configuration that will prevent your wheels from spinning. 
      • You'll be able to tell on the display what your traction is set to. “Max” would put a lot of traction on your wheels and could mean spinning will occur. 
  • The red switch is a lockout lever, which will configure the joystick to where it no longer works. 
  • On the Komatsu loader there’s a back-up camera. 
  • The right blue buttons are climate control, and buttons below on this keypad allow access to a menu. 
  • On the left there's an auto ride control that allows the boom to ride less stiff. 
  • There are also light switches on the left. 
  • Also on the left, there is a switch to allow you to operated the the bucket quick-connect so you can switch out different attachments and accessories. 
  • When you operate steering wheel, you can grab a hold of the knob on it. The steering wheel doesn't turn wheels, the entire machine pivotes. 
  • The cap pivots to the left with a clock-wise turn, and to the right with a counter-clock-wise turn. 
  • Even with the parking break out, the steering column is live. 
  • There are speed settings — 1, 2, 3, and 4 — on the left shifter, and you’ll usually start out at two. 
  • On the right side of the steering wheel there are wipers and lights. 
  • The red switch on the dash is the parking brake, after you turn it on, the red P on your dash will light up. 
  • If you try to put the machine in forward, it will not go anywhere, but will rather beep if the parking brake is on. Keep the parking break on until you’re ready to drive. 
  • On the floor are the gas petal to the right and there are two break pedals, a right and a left one. 
  • Randy generally teaches new operators to use their left foot because that’s what’s typical in a car. An advanced user could use both because there are different techniques one can apply some power going in and then also apply some break. 
  • When you pull back on the joystick the boom with start to raise. 
  • Most wheeled loaders have an auto leveler that curls the bucket away and this way material doesn’t fall out the back. 
  • If I move the joystick to the right, it will dump the bucket. And moving the joystick to the left will “close” or curl the bucket back, stopping a dumping action, and right hand forward brings the bucket back down. 

Driving 

  • When you’re driving you need to be sure the boom and bucket are in the driving position, which is down below the dashboard a few feet off the ground. Of course any higher and you can't see over it. And too low will mean that you could drag it. 
    • While you could have the bucket uncurled to make it ready to work, you could also risk unintentionally catching things as you drive, and so Randy recommends to have the bucket somewhat curled up. 
  • Now you’re ready to turn the parking break off. Shift in forward. If the loader is in auto traction control, and you take your foot off the gas, the machine will stop in its own. 
    • When you stop, stop with your foot, and shift it into neutral, and then put it back in forward. 

Scooping 

  • Before you scoop, you want to be lined up to drive in straight and level and horizontal with your bucket. 
    • As a new operator, you’ll notice that you really can’t see your bucket, and so how do you know whether you have it set correctly? It’s really judging by looking at the lines at the top of the wheeled loader, you’ll see a straight line on the bucket that will give you an indication of what the blade angle is. 
    • If you’re too open you’ll dig a trench in front of yourself, and of course, too curled up, you can’t get at the product correctly. 
    • When you uncurl the bucket you can lower it all the way to the ground, and then pick it up to around 6 inches above. 
    • To actually fill the bucket, you need to drive into the material and then at the point your bucket is full, you’ll add a little bit of curl at the same time. 
    • Wait before you back up, you don’t want to raise your bucket any higher because you could be top-heavy. You want to be “low and tight.” If you have the bucket up, you could tip. 
    • You’ll start to back up and bring your bucket down and curled up into the driving position, generally right below the dash. 
    • Drive to where you want to dump it. Be sure upon dumping that you’re lined up straight again because this is a lot more stable. 
    • You can start to raise up your load slowly as you approach. You’ll need enough room to clear your dump. Your bucket will come down about 3 or 4 feet as it tips forward. 
    • If you’re dumping onto a mound of dirt or decorative rock, you’ll be sure not to drive up onto the mound. 
    • After dumping, curl back or “close” the bucket. 
    • On this particular wheeled loader, when you move your joystick all the way to the left, you can set the curl-back to a particular angle, so that when you’re doing multiple loads, you can have it preconfigured to return to a “dig” setting (level bucket). 
    • Then, as you back away, you’ll bring the bucket down. If you’re too uncurled or low when you’re carrying product, you can lose your load. 

Smoothing Ground 

To smooth ground, you work with the weight of the bucket. 

  • You’ll disengage the hydraulics to the boom by pushing the joystick forward. This is also referred to as “putting the bucket into float.” You can still curl and uncurl the bucket, but the boom is disengaged in this setting. 
  • Your first option is to set the bucket down flat. You don’t want to smooth moving forward, only back. 
  • To smooth rougher ground, you’ll have the bucket curled forward. In any case, you’ll want to be sure you’re not picking up the machine with the boom, but only setting the bucket gently on the ground, but in a more open position. 
  • Here the smoothing process is almost like a dozer blade. 
  • When you’re ready to stop, you won’t simply engage and raise the boom. You’ll engage it and keep backing because there’s likely dirt or product behind the bucket that you’ll want to slowly smooth out to give an even finish. 

Parking

  • Rest your bucket flat. 
  • Disengage the joystick controlling the bucket with the lockout button. 
  • Put your parking break on. 
  • Verify you see the red P on the dash. 
  • Take off your seatbelt and slide your seat back. 
  • Turn your machine off. 
  • If you have a door, be sure it’s locket in the open position. 
  • Use three (3)-point contact when exiting.

To see all of the loaders we have in American Stone and Star Stone, within Odoo, in the upper black, "primary" menu, select "Fleet," and then in the secondary menu "Vehicles." In the search bar, type "loader."

YH 403: Forklift Safe Operating Rules

You should check your forklift at the beginning and ending of your shift. 


Here is a checklist of everything that you should check before operating, safety hazards should you be aware of, and refueling precautions. We have created an Equipment Checklist and Forklift Checklist on Google Drive you'll see by this name in the External Links. 


PRE-OPERATIONAL SAFETY CHECKS 


  • Check brakes, lights and horn before use. 
  • Ensure seat belt/safety restraint is in good condition. 
  • Know the capacity of the forklift or lift truck before using it. 
  • Do not use a forklift without a load rating plate. 
  • Always remember the Safe Working Load of a forklift reduces as the mast is tilted forward. 
  • Ensure that the lifting forks are in sound condition and centered either side of the mast. 
  • Check tire pressures. 
  • Never drive with a flat or under-inflated tire. Faulty equipment must not be used. Report any faults immediately. 


OPERATIONAL SAFETY CHECKS 

  • Do not use engine-powered forklifts in poorly ventilated areas. 
  • Always be on the lookout for pedestrians. 
  • Do not allow any person to ride on the forks. 
  • Ensure that the lifting tines are secure into the pallet and the load is stable before lifting or driving off. 
  • Be careful of ceiling clearance or overhead obstructions when raising the mast. 
  • Do not lift a load with the mast tilted forward. 
  • Always put the heavy end of the load against the load backrest. 
  • Never travel with the load elevated as it restricts vision. 
  • When approaching a blind corner, use horn and drive slowly. 
  • Always have someone guide you if a load restricts your vision. 
  • Slow down when changing direction or on wet or greasy surfaces. 
  • Do not travel with forks raised or reach mechanism extended. 
  • Avoid harsh braking, especially when carrying a load. 
  • Do not attempt to turn on an incline or sloping surface. 
  • Do not leave forks elevated when forklift is unattended. 
  • Do not dismount from a forklift while the engine is running unless the transmission is in park position and the parking brake is effectively engaged. 

When stopping the forklift: 

  • Park on even ground and lower the forks to the ground. 
  • Shift the gear selector to park position and apply the parking brake. 
  • Turn off the ignition and remove the keys. 

REFUELING & BATTERIES 

  • Do not refuel an engine-powered forklift unless the motor is stopped and ignition turned off. 
  • For gas powered vehicles change gas bottles in a well-ventilated area clear of a naked flame or source of ignition. 
  • In the case of electric vehicles wear protective eyewear and gloves when checking batteries and handling electrolyte. 


ADDITIONAL RESOURCES OSHA etools 

  • Power Industrial Trucks https://www.osha.gov/SLTC/etools/pit/assistance/ ​Safety and Health Topics​ Power Industrial Trucks-Forklifts https://www.osha.gov/SLTC/poweredindustrialtrucks/ ​Power Industrial Truck Operator Training​-FAQ https://www.osha.gov/dte/library/pit/pit_q-a.html ​Free ANSI Forklift Standards through ITSDF Industrial Truck Standards Development Foundation http://www.itsdf.org/ ​Utah Safety Council (Check on membership benefits, including free training and video streaming) http://www.utahsafetycouncil.org/content/Default.aspx